DIY Voiceovers at Home
A friend recently asked for advice about recording her own voiceovers (VO’s) at home, and although I get asked frequently about home studio equipment and setups I hadn’t yet written on the subject. Although she was asking about corporate video VO’s, this would apply to voice acting, audio books, ADR, podcasts, and pretty much any home audio recording. If you’re recording music at home, you will need additional information. This article is based on my research, experience, and DIY no-budget indie video/movie production, so any additional input is welcome – please comment!
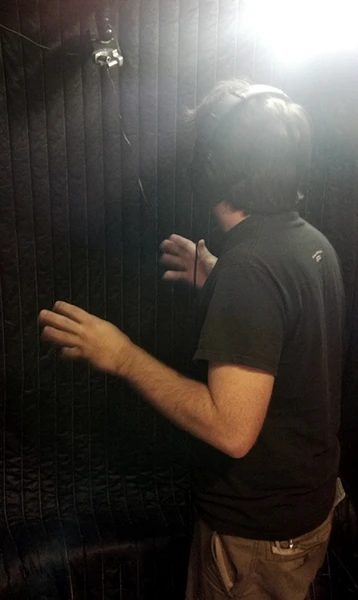 (With our low budget, my independent film ADR booth was essentially a padded closet.)
When NOT to Record at Home:
I like to start with this advice, especially if you’re getting paid for your work. Whenever it’s convenient, I recommend that new talent record in their client’s studio (if applicable) or in a nearby studio if the costs are low enough to be covered by the gig. This ensures that from the very beginning you submit work which is of a high enough quality to get you more work; in the meantime, you can glean a little knowledge of the “professional” studio’s equipment, space, and technique.
Recording at Home:
So, you’ve decided to ignore the advice above and delve into home recording. Recording from home can save you travel and studio rental expenses on every job, allow you free reign to experiment on your own time, and potentially bring in more income if your setup is impressive enough to charge others for its use. Honestly, it is not terribly difficult to set up an acceptable home recording space. There are several considerations when recording your VO’s at home, and I will focus on these essentials:
- Isolation (Filtering External Noise)
- Absorption (Stopping Reflections)
- Recording Equipment
- Monitoring Equipment
Getting each of these factors to the level of professional, near-perfection can get very expensive, but getting to an acceptable level isn’t.
Isolation:
The first factor here is location. It is generally harder to isolate sound in the city than in rural areas. You may not have many choices, and likely don’t plan to change residences to accommodate your recording needs, but you can choose which room is the most isolated from outside noise. Listen for car/air/train traffic, outside AC units, lawnmowers, neighbors (especially in apartments), and running water (e.g. toilets flushing elsewhere in the home).
Absorption:
This pertains to what your voice does within your chosen recording space. The simple rule is: soft surfaces absorb sound (good), and hard surfaces reflect sound (a.k.a. echo = bad). If you record in a tiny box, it will sound like you’re in a tiny box. For most recordings, the sound should be as “dead” as possible (no echo), because echo can always be added later, but never removed. Empty closets make great booths because there is so little surface area to account for if you’re trying to pad the walls.
Reflection Filters: A compact, very cheap solution, which also has a professional look, reflection filters work by blocking sound reflections directly around the microphone instead of for the entire room (here’s a search on B&H)
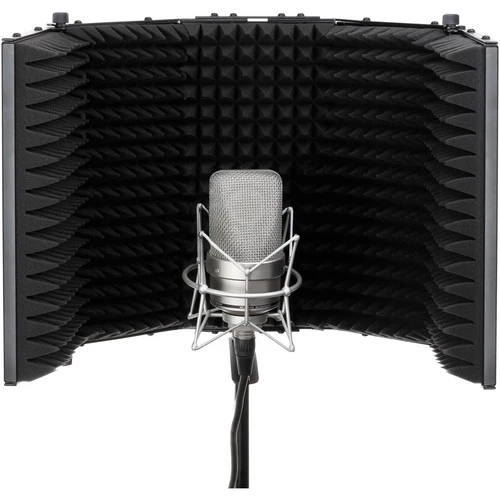 Auray Reflection Filter (Photo property of Auray)
If covering the area around the mic isn’t enough, many studios “treat” the whole room. Your largest hard surfaces are your walls, which you will want to cover as thoroughly as possible. First cover the wall behind your microphone, the direction you’re speaking towards. Then work your way around.
Sound Panels: The most attractive and stylish solutions are VERY expensive. They range from very thin to several inches thick. Cheaper ones look like egg crate foam, more expensive ones look like thick canvases.
Sound Blankets: Big ugly blankets that cover large amounts of wall space for very cheap. The ones I bought for my booth at home came from Audimute. I didn’t care about color, so I got an offprint pack (about $300 for five 8’x4′ blankets.) Audimute discontinued this version, but they are essentially glorified moving blankets. You could ask a moving company for used blankets, or try hardware stores, just make sure they’re very thick.
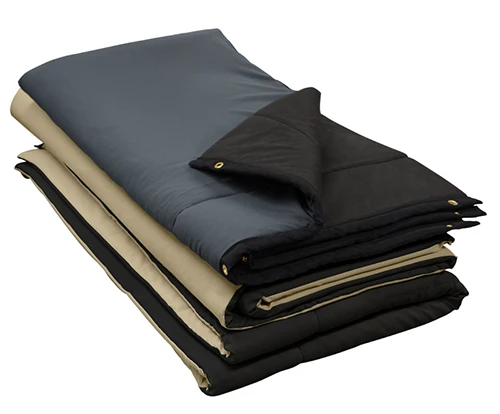 Audimute Sound Absorption Sheets (Image Property of Audimute)
Recording Equipment:
This area can be largely a matter of opinion, so I won’t dwell much on microphone models and makes. You will need a microphone, and you will need a reliable way to get it into your computer without having it sit directly next to your computer. The clicking, whirring sounds a computer makes will ruin a recording every time, so try to get a long cable to distance your mic from the computer. Some folks will use a mixer, and in the long run I would recommend it, but it may not be necessary at first. Audacity and Reaper are free software options for recording to a computer. [Update 2025: Reaper is no longer free, but they have a free trial and a persistent license option.] Personally, I run a cable all the way out of my closet, under the door, over to my computer desk. Building a divider “wall” between your mic and computer will work too, and could be as easy as propping up a pillow beside the computer. If the wall on the other side isn’t treated though, the sound will bounce right back at you.
Monitoring Equipment:
This is often the most overlooked part. You cannot ensure that you’re capturing and sending off a great quality audio file unless you have professional equipment to listen to it with. Laptop speakers, earbuds, and portable devices are complete garbage. A good set of speakers will cost you, and won’t block outside noise while you strain to listen, so I recommend a good pair of headphones. Not all headphones are accurate. An expensive brand of music headphones, promoted by a famous rapper, for example, may boost the bass too much and make you incorrectly adjust your voice to remove this heavy bass. I haven’t used every pair of headphones, but I would bet my career on my Sennheiser HD 280’s. At $100, they are one of the cheapest pairs of passive noise-cancelling, high fidelity headphones on the market. You do not need to buy $2,000 headphones when you’re starting basic voice-over work.
You can do all of this with nearly nothing, or you could wipe out your bank account getting the best gear available, it’s all up to you. You can record great sound on the cheap just by considering the four key topics above. Happy recording!
Share this on: Facebook | LinkedIn | Reddit
Further Reading
Next:
Ten Adobe Premiere Shortcuts for Faster Editing
Previously:
NASA Sounds From Space
Back to All Blog Posts